Pages

Showing posts with label project. Show all posts

Sunday, April 22, 2012

I'm Too Ambitious

Since we're talking about sewing beyond my skill.
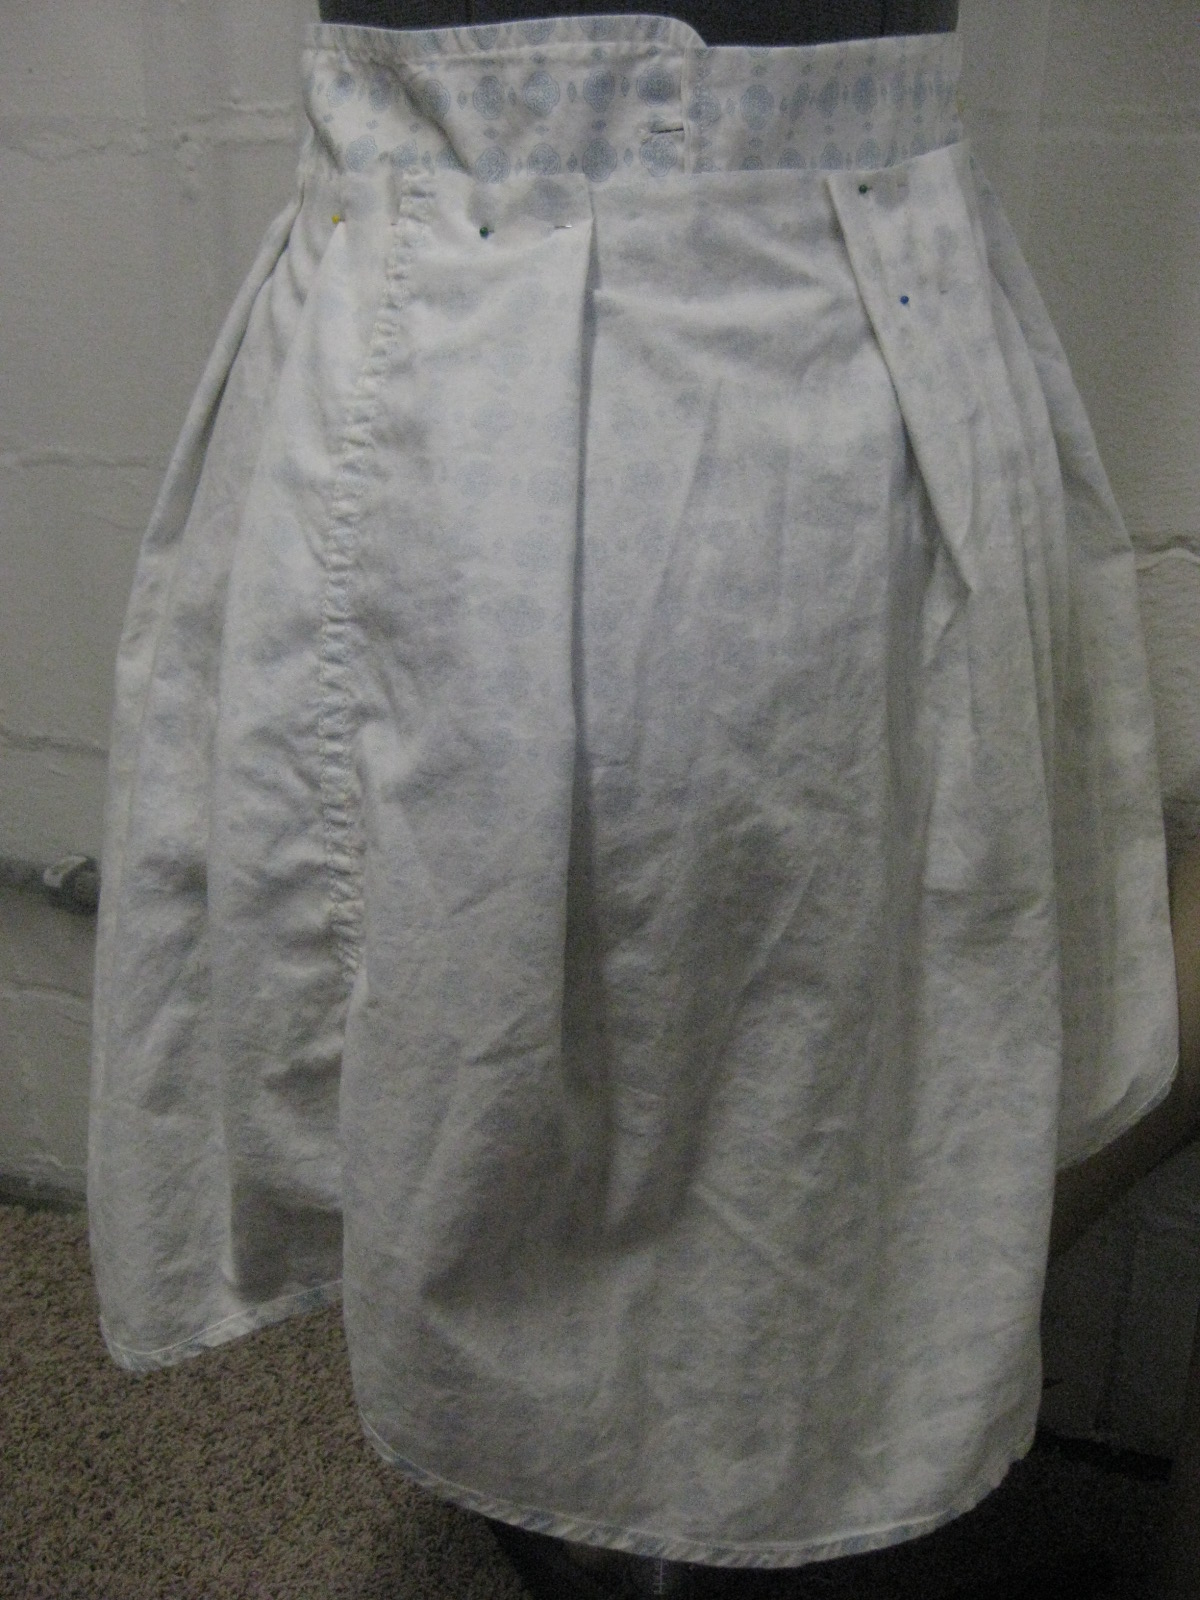
Arg! It's always something. Last time it was the fray of doom. That's in check now, but I seem to have reached beyond my grasp. Instead of putting waist pleats in this new shirt-skirt like I did with the previous one, I broke out my rockin' French curve and made some hips. It went quickly and well until it didn't.

Problem #1: My markers aren't unmarking. I got a pair of those markers that you can mark and wash away. Only, they're not washing away! No matter how much I wipe, I just end up moving a blue line around my skirt. GRR!

Problem #2: Part of the beauty of turning a men's shirt into a skirt is that some of the work is already done. The button holes are stitched. The buttons are attached. The hem and side seams are finished. Oh, yeah, the seams. I sort of undid that with my brilliant French curve hippy work. Nice. I literally spent half and hour reading up on seams to figure out how to finish these seams.

Problem #3: The answer is a mock French seam. To do a mock French seam, I need to iron my current seam flat. Uh, it's already curved. That happens when you use a French curve. To proceed, I need a tailor's ham -- a 3D ironing board.

Problem #4: I removed some cuff buttons to replace them for visual interest. I removed the wrong buttons. Now I have to sew them back on.

Sigh.

Tuesday, April 17, 2012

Fray of DOOM!

I'd already made the awesome lower half of my next men's-shirt-upcycled-into-a-skirt and was about to start on the waistband when I noticed this:
That is the fray of doom, people! It's right on the cuff, the top of the waist band.

I had planned on listing this skirt on Etsy and I was especially excited about it being a larger size (34 inch waist) because Etsy is full of tiny people. I'm sure I can stop the damage with fray check and fusible webbing, but I can't make the wear disappear. So do I not list it? Do I note that as an upcycled item there is regular wear to the fabric?

Sunday, April 15, 2012

Upcycled Men's Shirt

Skills acquired: pleating, using hem tape

I made a skirt! This is the finished product of my upcycled men's skirt. I'm particularly proud of the pleating. I finished the hem at the waist with hem tape, a substance I will wax poetic about in the future.

It's a pretty simple design, so I'm trying to think of ways to jazz it up. Contrasting waistbands, upgrading buttons, piping, ruffles. When I have more, I'll list them on Etsy!

Thursday, March 29, 2012

Men's Shirt Into a Skirt

In November I bought an armful of men's shirts to turn into skirts. This project got shoved aside for Christmas, but after the recent passing of my snuggle bunny, I needed something light to distract me.

I want to maybe get more creative with some of these shirts, but the blue pattern is busy enough that I was okay sticking with a simple design. Using this tutorial for the rough idea, I sat down with some Law & Order: Criminal Intent and my seam ripper. I decided to start with the blue patterned shirt. The first step is to remove the cuffs...I hate these cuffs. They were triple stitched onto the sleeves. I was ripping them out for at least two episodes. For comparison, I removed the entire sleeve of the polka dot shirt in 15 minutes.

Sewing the waistband went rather well. I consulted some of my books, chanted "I can do this! I am awesome!" In 30 minutes, I had a beautiful waistband...that was backwards. Frustrated, I abandoned my project for the night.

The next night, I fixed the waistband and pinned the skirt in place. I felt I couldn't finished the edged and get it properly pinned, so I'm going to get some hem tape to make things neat. Finished pictures in a couple days!

Sunday, January 8, 2012

Appliqued Robots

Skills acquired: applique, using fusible and non-fusible interfacing, dull needle identification

Meet my first applique.This was done on a toddler's tee shirt. I tried a variety of stitches on scraps first, and liked the zig-zags best. I know that will mean a little fraying, but that's okay. The button belly is happy.

I had black fusible interfacing and white non-fusible, so I had to use the non-fusible. (I've since stocked up on fusible.) I'm not sure if it was the best thing to use. It felt stiff, but that is sort of the point.

This is what I was putting on a onesie when my machine punched a hole in it. I had one antennae and the face left to do. That's all! The repair shop said they should have my machine ready by Monday. I miss it so much!

Sunday, December 25, 2011

Mother & Child Aprons

Skills acquired: pattern drafting, pattern cutting, cutting on the bias, sewing on the bias, making pockets, stitch the ditch, using bias tape, mitered corners

This was my big Christmas project, an apron for my sister-in-law and her son. (He's three and loves to play chef.) The pattern is a combination of things I drew up myself on postal paper and patterns from Stitch by Stitch (the picnic place mat and pockets from a skirt). My nephew's is extra fun because the belt and pockets can be untied and snapped off to be worn as just a tool belt.

I'm very proud of my invisible stitches!
The gear print fabric is twill. I'd never worked with twill before and learned that it likes to twist. But then some of it was cut on the bias too. I made all the tubes first so I could watch Damages while I turned them inside out.

Since making these, I've acquired a hem gauge so ironing the hems will take far less time. I also realized after I made my nephew's apron that I'd hemmed the first fold then the second (fold-stitch-fold-stitch) when really I only needed to fold-fold-stitch. Hers also has mitered corners, while his are bulky folds.

For future aprons, I think I'll install d-rings at the neck to adjust the strap. For the little boy's tool belt, I'll add a hammer loop as well. Part of me also wanted to use a zigzag stitch in a contrasting color for the hems just for interest. I may try that in the future too.

A few people were interested in me making them aprons, so I'll set up a custom order on Etsy. (More on Etsy later.) I'll post here when the link is up.

Sunday, December 11, 2011

Projects in the Queue

I'm still working on secret Christmas projects, so no photo updates this week. But soon there will be a slew of project posts. I have a lot lined up.

- Pillowcases The pillow cases I have are a terrible dye. I bought two lovely olive brocades which will give me some slippery fabric experience as well as practice putting in invisible zippers.

- Apron I've been using the same apron since middle school home-ec. The fabric is terrible. I'd love to use some of the techniques I've learned to make something retro and dress-like.

- Applique Robots One of my friends has two boys, so I thought I'd learn appliques by making some nice linear robots for their wee little shirts.

- Silhouette Skirt I have big, big plans for this. My first one will be for my dear roomie!

- Scarf Winter is nippy. Making some scarves will get me started on jersey and several fabric techniques.

Thursday, November 17, 2011

Quick Thoughts for the Week

I made a second Charm Pack skirt this weekend both to apply what I'd learned and to see how much faster a project would be the second time. Even with a couple unforeseen problems, the second was finished in under two hours. We won't talk about how long the first one took. (This is also why I'm posting something so scatter shot instead of a "look what I made!")

Working on this project has really built my confidence. I catch myself looking at lots of clothes and patterns now and thinking, "It's just some straight lines and some curved lines. I can do that."

I just realized that the Charm Pack skirt pattern can be altered using strips of fabric instead of squares in a light organza. Voila! Petticoat.

While on an excursion to Goodwill this past weekend, I picked up some men's shirts to make into skirts. (See the excellent photograph to the left.) Very excited.

When I cook, I look up several recipes and pull from each to make my own version. I've been doing the same with sewing projects.

I put in a tutorials tab to keeps tabs (ho, ho! punny!) on cool things to try. You're welcome.

I'm upping my level from super beginner to beginner. Break out the champagne!

Sunday, October 23, 2011

Tulle Layers

Skills acquired: patience, profanity, respect for tulle

I, having all the patience of a three-year-old, did not want to develop sewing skills by making napkins, graduating to pillows, then practicing bags. Oh no. I want to work on clothes now, now, now! I've had a jersey, melon skirt for a couple years now that I never wear because it's Spanx or vpl. Sounds like the perfect thing to alter, no?

With my flair for the dramatic, I thought this would be a fine base layer for a neon yellow tutu. "Tulle will be great," I thought," because I wont' have to hem it!" Turns out I'm just the sort of naive mark shifty tulle lays in wait for.

I folded and trimmed this with only a tape measure as my guide. Remember what I said about shifty? le sigh. It was all sorts of uneven. I was so frustrated with it, I spent weeks just glaring at it on my dress form.

Eventually, I decided to just plow through it. I sewed the layers together, gathered them, sewed them to the skirt, sewed up the back (that part took at least three tries), and sewed on the ribbon that covers my terrible stitch work.

This is the finished product. (I think like look like one of Toulouse-Lautrec's cancan dancers and even topped the outfit with a hair feather.) Notice the lack of detail shots. It's puffy at the top, and the stitching is all over the place. The back is especially awful, so I spared you a photo. No doubt I'll want to redo this later, add more tulle -- cut properly -- and stitch straight. But for now I can say, "I made this!"

Sunday, October 16, 2011

The First Thing I Made!

Skill acquired: back stitching

My mom got me some shiny fuchsia polyester, and I had no idea what to do with it. Then I stumbled upon a tutorial for making flowers out of polyester. The flowers are insanely easy to make.

1. Cut circles of different sizes out of the fabric. They don't need to be perfect circles.
2. If you want a poppy, leave the circle as is. If you want more of a rose, snip some cuts into the circle.
3. Using a candle, melt the edges.
4. Pile the petals together by size.
5. Stitch together.

I made a bunch of flowers. These two were sewn onto elastic headbands and topped with skull buttons for some punker babies I know. I plan to turn the others into a bib necklace. They're super simple to make, but it felt good to both finish a project and be able to say "I made this."